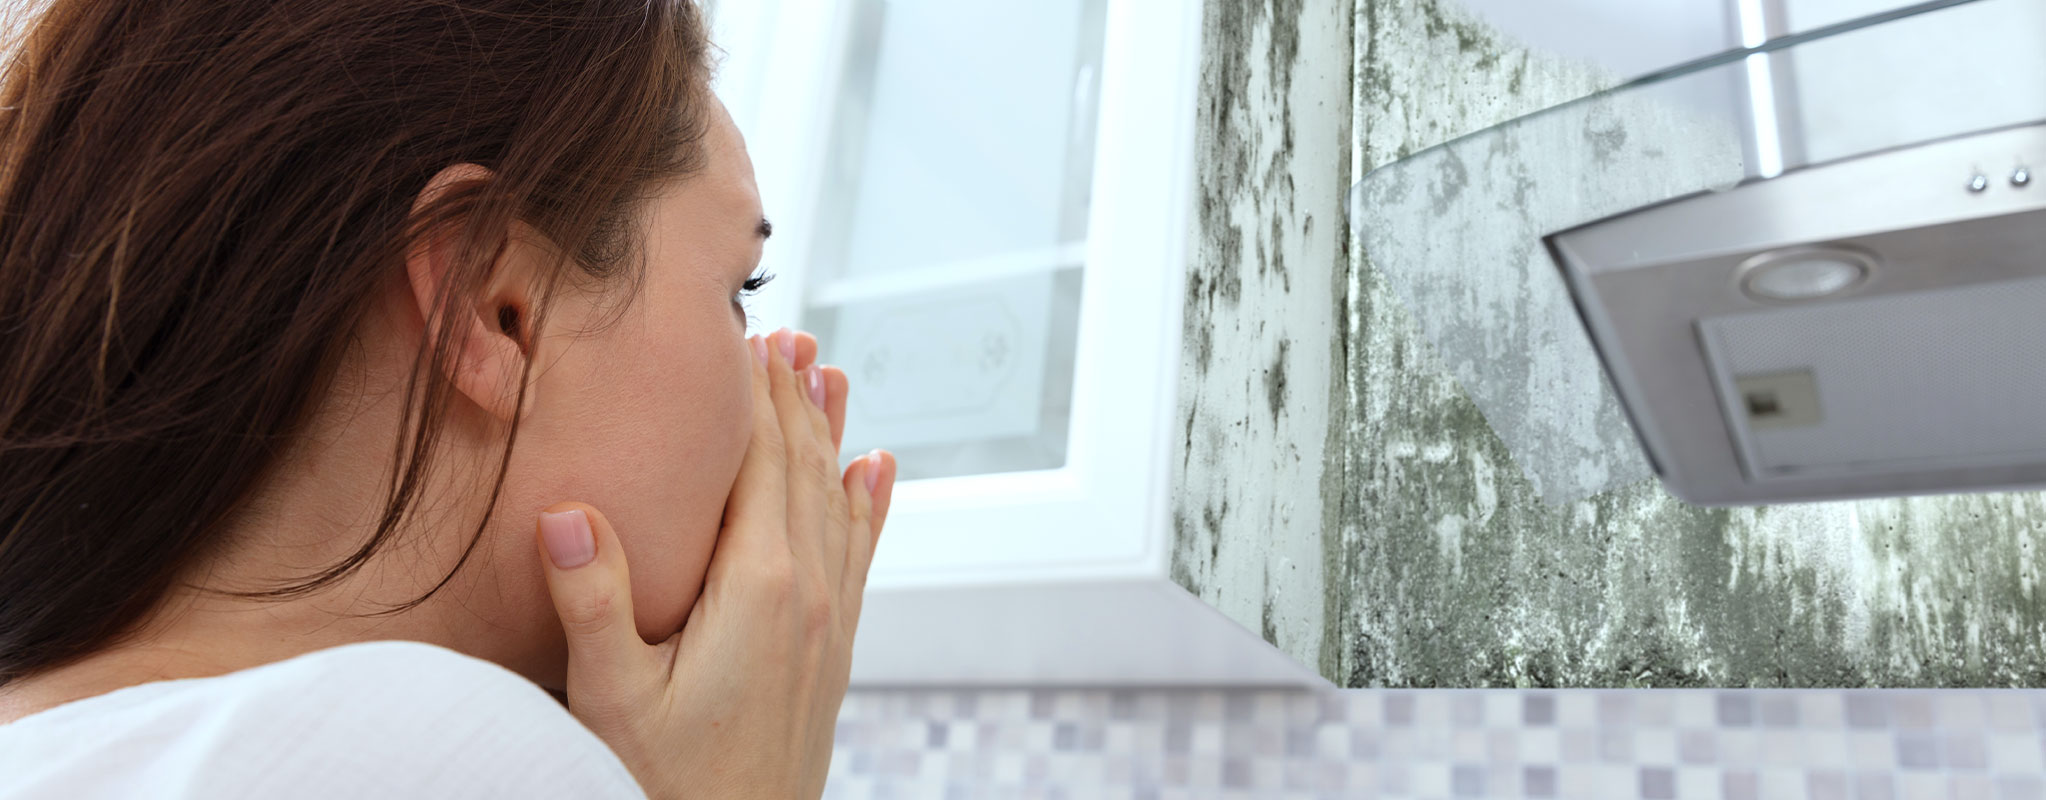
Mold discovered on the interior walls of a rental is an environmental hazard that can cause concern among tenants. Not only does it look unpleasant, but exposure to toxic mold is a health hazard that could cause health problems such as respiratory issues, rashes, and chronic fatigue.
As a landlord, you can be held liable for any issues caused by mold in your building. Tenants have won multi-million dollar cases against landlords for significant health problems caused by exposure to toxic mold in their rentals, so it’s best to take care of the problem not only for the health of your tenants, but for your wallet.
If you suspect mold in your rental, learn what to look for and how to safely remove it so you can avoid rental complaints and ensure a safe, healthy living space for your tenants.
Find local pros for maintenance
Thumbtack helps you find local pros for maintenance projects. Browse profiles, read reviews, and compare options so you can choose the right pro for your needs.
What Does Mold on Drywall Look Like?
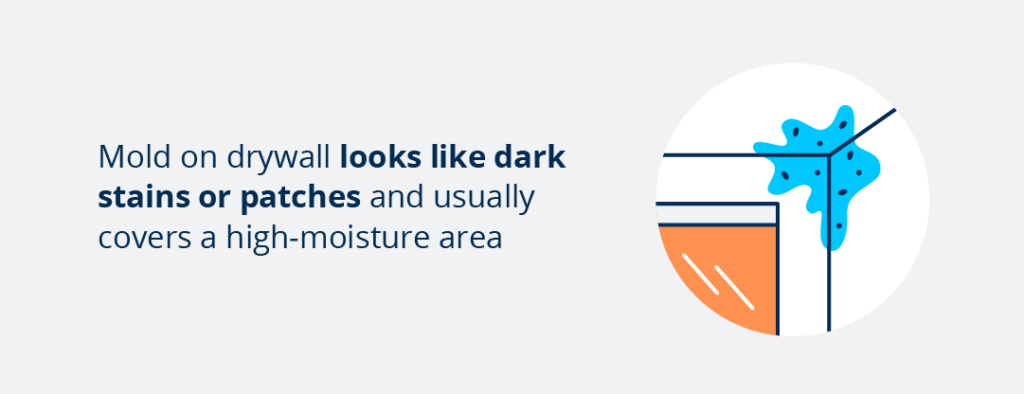
Mold on drywall looks like dark stains or patches and usually covers a high-moisture area. Most often, mold grows in humid or poorly ventilated areas of a home such as bathrooms, basements, kitchens, and laundry rooms.
Mold also commonly appears if your home has suffered from water damage as drywall soaks up the sitting water. Although it may seem easy to identify dark patches on your wall, most of the time mold grows inside the walls. Below are signs that indicate you have mold in your drywall.
Discoloration and Stains: If you notice yellow or brown water stains on your walls, then it’s likely you have mold growing behind them. If those spots are damp, then it’s an apparent sign of water damage, which means mold is already there or not far behind.
Deterioration: Paint or wallpaper can crack, peel, or bubble because of moisture and mold growth. When there’s a water issue, your walls may become warped, bow, or bulge – which often leads to mold growth.
Odors: Mold gives off a musty odor, so if you sniff out something stuffy and stale, it’s most likely mold. To get a better whiff, you could sniff the electrical outlets since they are the best access to the space behind your walls.
Different Types of Mold
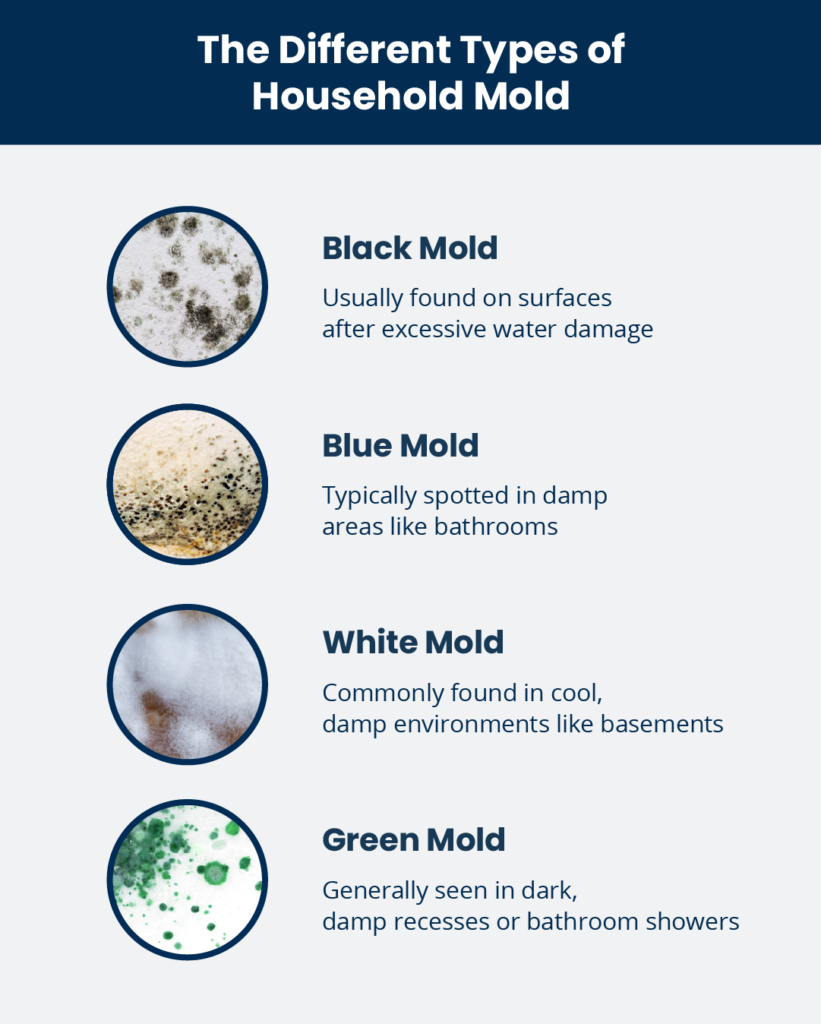
Although most mold on drywall looks like black splotches, mold can appear in various shapes and colors, none of which actually determines the species of mold. Learn the different types of mold so you can detect which kind has affected your home.
Black Mold: Black mold is often found inside houses with excessive moisture damage. The mold itself isn’t harmful, but it has the potential to produce mycotoxins that could potentially cause harm to people and pets if left untreated over a long period of time.
White Mold: White mold often grows in cool, damp environments such as basements. It’s often confused with efflorescence, which is a crystalline deposit of salts that can form when water is present. To test for white mold, spray it with water — if the spot doesn’t dissolve, then it’s most likely mold.
Blue Mold: Blue mold has a bluish-green color, can grow within 24 to 48 hours and requires little moisture to develop. It can be found in drywall, wallpaper, ceilings, and insulation that has been damaged by water. It can also be found in areas that are often damp such as bathrooms.
Green Mold: Green mold may be identified by its greenish hue and is found in dark, damp recesses. Like blue mold, it’s often found in bathrooms or dark corners.
Should I Replace Moldy Drywall?
If you find mold on your drywall, you’ll most likely need to get it replaced. Mold on drywall can indicate a deeper problem in the stud space behind your wall since it can penetrate the surface. In this case, you’ll need to cut it out and replace the drywall in the affected and surrounding areas.
If your drywall is painted and you catch it early, mold usually can be scrubbed away using a natural cleaning solution like baking soda or, in severe cases, chemicals like bleach.
How to Remove Mold on Painted Drywall
If you find mold on painted drywall, it’s much easier to clean. Since paint provides a barrier on the drywall, the mold most likely hasn’t penetrated the surface, meaning you just need a good cleaner and some elbow grease.
Before you start, make sure you identify the source of moisture causing the mold in the first place and fix the issue. Then, follow these steps to remove mold on painted drywall.
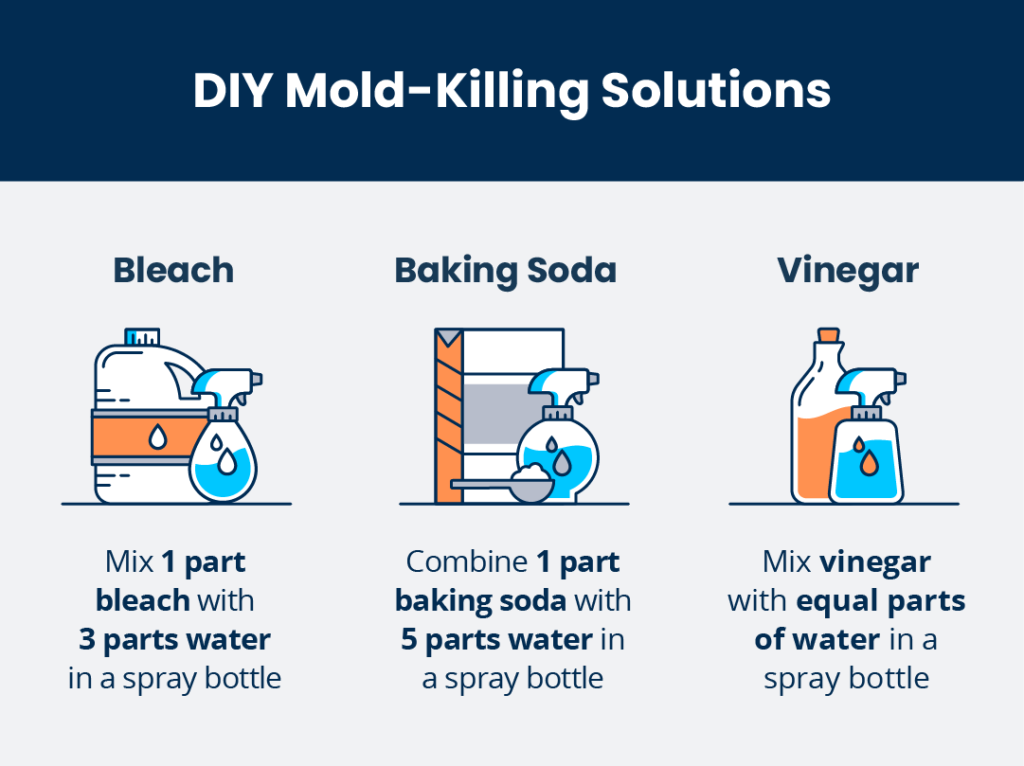
Step 1: Make a Mold-Killing Solution
Pro Tip:
Whenever you’re mixing your own cleaning supplies, do not combine or use them with any other cleaners or chemicals without thorough research. Many combinations, such as vinegar and bleach, can be extremely harmful and even deadly.
There’s plenty of mold-killing cleaning agents available, ranging from chemical to natural alternatives. Here are a few options to choose from:
Bleach: Mix one part bleach with three parts water to offer a strong mold-killing solution. Be aware that bleach contains strong fumes that can be harmful to breathe in, so make sure your area is well ventilated.
Baking Soda: Combine one part baking soda added to five parts water. This is the mildest and safest cleanser to use which is perfect for those who have pets or children.
Vinegar: Mix vinegar with equal parts water to create a slightly stronger cleaning solution than the baking soda remedy above. It’s also completely natural and safe when there are pets or children around, but the mixture does have a strong scent.
Concrobium Mold Control: This store-bought spray solution is made to remove mold and mildew while eliminating musty odors in the process. It also prevents regrowth by creating a protective barrier.
Depending on the severity of the mold on your drywall, you may want to opt for a stronger chemical solution like bleach or Concrobium Mold Control spray.
Step 2: Ventilate the Room
If you opted for a stronger chemical solution like bleach, make sure you properly ventilate the room before you start spraying. Open all the doors and windows so you can air out the room of the toxic fumes.
Step 3: Protect Surrounding Areas
To ensure you won’t spill any chemicals or cleaning solutions on other surfaces, make sure to protect surrounding areas. Move any furniture and other items outside the room and cover the floor with a plastic drop cloth.
Step 4: Spray the Mold With Your Solution
Once you’ve made necessary preparations, it’s time to attack the mold. Use your spray bottle full of your chosen mold-killing solution and spray a little on the mold. Don’t drench the area as additional moisture can make the mold on drywall worse or even damage your walls.
Spray once or twice to cover the moldy area. If the solution is running down the wall, you’ve sprayed too much.
Step 5: Scrub the Moldy Area
After you’ve sprayed your solution, use a soft bristle brush or old toothbrush to scrub the area. You should scrub until you no longer see any visible mold splotches around the area. Make sure you don’t scrub too hard and damage your wall.
Step 6: Dry the Area
Once you’ve removed all visible mold from your drywall, make sure to dry the area thoroughly. Areas that are left wet or damp are a breeding ground for mold, so point a fan at the wall on full blast to help dry it quickly.
Remove Mold on Unpainted Drywall
If you’ve discovered mold on unpainted drywall, the issue is much tougher to deal with since there was no protective barrier to help prevent mold from penetrating the wall.
In this case, you’ll need to remove the affected and surrounding areas on drywall to replace it. First, make sure you stop the source of moisture and then follow these steps to remove mold on unpainted drywall and replace it.
Step 1: Protect the Surrounding Area
Start by moving all furniture, wall decor, and other items out of the room to give you space and ensure those items won’t be affected by mold spores. Protect the floors with a plastic drop cloth.
Step 2: Cut Out the Moldy Drywall
Once you’ve protected the surrounding areas, use a stud finder to locate wooden support behind the wall to attach your new piece of drywall. Then, mark the area you plan to cut with a pencil, making sure to account for an additional two feet larger than the visible mold to ensure you get any mold you can’t see.
Using a utility knife, cut out the section you marked. Do not use a power saw as this can agitate the mold and cause the spores to go airborne. Carefully remove the drywall and place it mold side up on the plastic cloth on the floor.
Step 3: Clean and Dry the Cavity
Using a mold-killing solution, like mold control spray, bleach, or vinegar, clean the cavity thoroughly. Once you’ve lightly sprayed the cavity and removed any mold that was behind the drywall, it’s time to dry. Use an electric fan on high to ensure it dries completely.
Step 4: Dispose of the Moldy Drywall
While the cavity is drying, dispose of the moldy drywall that was placed on the plastic-covered floor. Wrap it up using the plastic drop cloth it was placed on and throw it away. Make sure it’s tightly sealed so the disturbed spores won’t spread.
Step 5: Fit and Secure the New Drywall
Once the cavity is dried thoroughly, replace the drywall with a new piece that is the same size as the one you cut out. Do this by measuring the missing sections of the drywall and cutting the new section to those exact measurements.
Attach the new piece of drywall with screws and apply a joint compound to patch the seams. Once it’s dry, you can sand it down for a smooth finish.
Step 6: Clean the Room With a HEPA Vacuum
Lastly, use a high-efficiency particulate air (HEPA) vacuum to clean the room. This will help remove any mold spores that may have landed in the surrounding areas which could cause mold to reappear.
Spotting mold on drywall isn’t ideal, but taking quick action to remove it will help ensure your tenants are living in a safe environment, usually outlined in a lease agreement. When there is just too much mold to remove on your own, seek professional help so your rental will be mold-free and fit for tenants.
Disclaimer: This blog is for informational purposes only and is published by TurboTenant. It is not legal, financial, or tax advice. Laws and regulations for landlords vary by state and locality and may change over time. Always consult a qualified attorney, accountant, or local housing authority before making decisions related to your rental property. The publisher and authors assume no responsibility for actions taken based on the information provided.